How to Install Aluminium Pool Fence on Concrete
To install an aluminium pool fence on concrete, start by thoroughly cleaning the concrete surface. Use a concrete etching solution and then apply a bonding agent to ensure strong adhesion.
Accurately measure and mark the positions for the fence posts, making sure they are level. Use a masonry drill bit of the correct size to drill holes for the posts, achieving the right depth and alignment. Insert anchor sleeves made from durable materials like PVC or metal to provide stability.
Check that the aluminium posts are resistant to corrosion and ensure they are correctly aligned and level for a secure installation. Securely attach the fence panels, following the manufacturer's instructions for spacing and attachment points.
By following these steps, you will create a safe and visually pleasing boundary around your pool, with further details becoming apparent as you progress through the process.
Preparing the Concrete Surface
Before you proceed with installing your aluminium pool fence, it's imperative to thoroughly cleanse the concrete surface to remove any dirt, debris, or grease that might impede the fence's adhesion. This preparatory step is critical in ensuring the durability and stability of your installation.
Next, for better adhesion, it's recommended to apply a concrete etching solution. This process roughens the concrete surface, providing a more receptive base for the fence. Overlooking this crucial step could result in suboptimal bonding between the aluminium and the concrete.
After the etching process, a concrete bonding agent should be applied. This agent acts as an adhesive, guaranteeing a strong, lasting bond between the aluminium fence and the concrete surface. This step is vital in augmenting the overall structural integrity of the installation.
It is necessary to wait until the concrete surface has entirely dried before proceeding. This patience ensures that the preparations aren't compromised by trapped moisture, which could cause adhesion issues later.
Measuring and Marking
Before you start the actual installation of your aluminium pool fence on concrete, you'll need to select the correct tools and accurately identify the layout lines. Ensuring you have the right equipment available, such as a high-quality measuring tape, chalk or marker, and a spirit level, is essential for accuracy.
This stage will lead the entire setup process, from accurately marking the fence post locations to confirming their levelness on the concrete surface, setting the scene for a successful installation.
Selecting Proper Tools
To ensure the precise placement of your aluminium pool fence on a concrete surface, it's essential to choose the right tools for measurement and marking. These tools include a tape measure, spirit level, and chalk or marker.
The accuracy of your measurements is crucial for both the appearance and functionality of your fence. Accurate markings help to guide the drilling process, preventing posts from being misaligned, which could compromise the integrity of the fence.
Before you proceed, always double-check your measurements and markings. This careful approach not only ensures a visually pleasing outcome but also maintains the structural strength of your fence.
Taking the time to measure and mark the installation area accurately is key to achieving a professionally installed and long-lasting aluminium pool fence.
Identifying Layout Lines
Accurately measuring and marking the layout lines for your aluminium pool fence on the concrete surface is a critical step to ensure the fence's proper positioning and stability. Start by using a tape measure and chalk or marking pencil to outline where you'll place the fence posts and panels.
It's vital to ensure your measurements are precise, as this will dictate the overall alignment and appearance of your fence. Use level tools to verify that your layout lines are straight and correctly aligned, ensuring a professional and secure installation.
Before proceeding to drill or attach any components, recheck the layout lines for accuracy. Finally, remove any debris or obstacles from the marked layout lines to prevent interference or inaccuracies during installation.
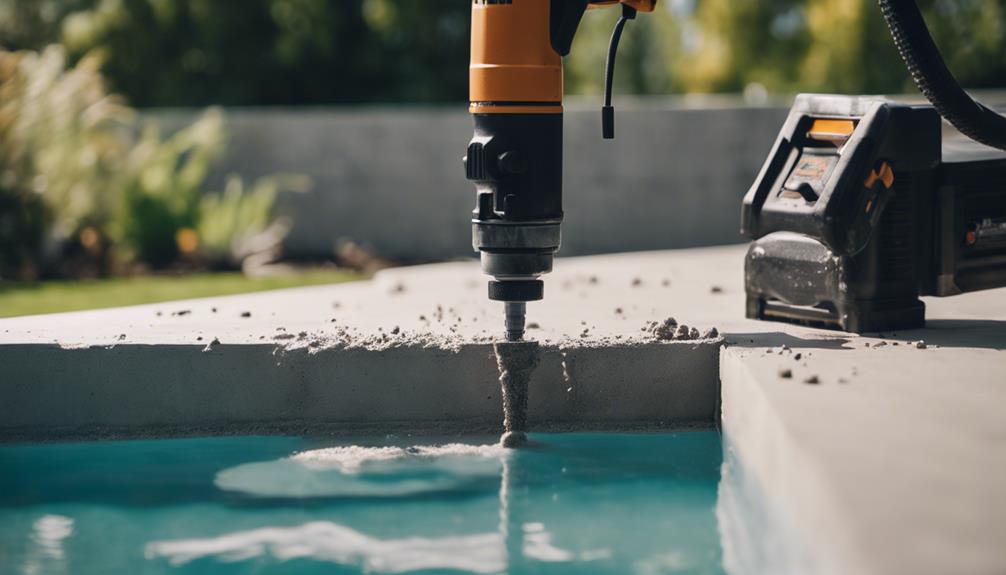
Drilling Holes for Posts
When fitting an aluminium pool fence onto concrete, the initial step involves using a hammer drill equipped with a masonry bit to create holes for the fence posts. This phase is vital, as the drilling quality significantly affects the fence's stability and longevity. You must ensure the holes are sufficiently deep and wide to securely anchor the posts.
Here's a detailed guide to assist you in the drilling process:
| Step | Detail |
|---|---|
| 1 | Select the correct masonry bit size for your hammer drill. |
| 2 | Mark the precise drilling locations on the concrete, according to your layout lines. |
| 3 | Adjust the drill's depth to match the length of the anchor sleeves. |
| 4 | Drill the holes, applying steady pressure and speed for clean cuts. |
| 5 | Remove any debris from the holes to prepare for the installation of anchor sleeves or expansion anchors. |
This guide aims to provide clear, step-by-step instructions for efficiently preparing concrete surfaces for the installation of aluminium pool fencing, ensuring a secure and durable setup.
Installing Anchor Sleeves
After drilling the required holes into your concrete surface, the next step involves installing anchor sleeves to ensure that your aluminium pool fence posts are securely fixed. Anchor sleeves are crucial for creating a stable base for your pool fence, which significantly enhances its durability and strength. These sleeves are usually made from strong materials such as PVC or metal, designed to withstand the tough outdoor conditions.
The installation process begins with carefully inserting the anchor sleeves into the pre-drilled holes. It is essential to ensure they are perfectly aligned and positioned at the correct depth to provide the best support for the fence posts. This accuracy is vital for maintaining the integrity and longevity of your pool fence.
Once the anchor sleeves are in place, you have laid the groundwork for a sturdy and reliable fence structure. It is important to note that properly installed anchor sleeves are the foundation of a secure pool fence, preventing the posts from becoming unstable and shifting over time. By following these instructions, you are well on your way to creating a safe and aesthetically pleasing barrier around your pool area.
Setting Up Fence Posts
Before you start the actual installation of your aluminium pool fence, it's essential to choose the correct fence posts and get ready to drill the post holes on your concrete surface.
You'll need to make sure the posts you select match the fence design and are suitable for installation in concrete.
Then, using a hammer drill and a masonry bit, you'll carefully make accurate holes for these posts, ensuring they are correctly placed for a secure and stable fence.
Selecting Fence Posts
Selecting the appropriate aluminium fence posts for concrete installation is crucial for the durability and stability of your pool fence. It is essential to ensure that the posts you choose are resistant to corrosion and compatible with concrete anchoring techniques. This not only extends the life of your fence but also ensures a secure installation. The use of specialised anchor bolts or concrete screws can significantly improve the connection between your aluminium posts and the concrete surface.
| Feature | Importance | Recommendation |
|---|---|---|
| Material | Essential for durability | Aluminium |
| Corrosion Resistance | Prevents deterioration | Confirm before purchase |
| Anchoring Method | Ensures stability | Specialised bolts or screws |
It is recommended to pay close attention to proper installation methods and check the spacing and alignment in line with the layout and design of your pool fence for a strong and long-lasting foundation.
Digging Holes for Posts
To install your aluminium pool fence on a concrete surface, start by drilling holes for the fence posts using a hammer drill equipped with a masonry bit. The holes need to be deep enough, usually around 600mm, to ensure the fence is stable.
After drilling, insert anchor sleeves or expansion anchors into these holes. This step is crucial as it anchors your aluminium fence posts securely into the concrete.
Next, place the fence posts into the anchor sleeves and fasten the anchor bolts or screws to secure them in place. Before the concrete sets, it's important to check the alignment and level of the posts, ensuring a safe and sturdy installation of your pool fence.
Attaching Fence Panels
When attaching aluminium fence panels to concrete, it's necessary to use concrete anchors or screws that are specifically designed for this purpose to ensure a stable and long-lasting installation. This step is critical for establishing a secure perimeter around your swimming pool. Correctly secured panels not only increase the safety of your pool area but also contribute to its overall visual appeal.
To make the process more efficient and to guarantee that your fence panels are perfectly aligned and secure, consider these tips:
- Pre-drill pilot holes: Doing this facilitates the insertion of the concrete anchors or screws and helps to prevent cracking or damage. It ensures that your fence panels are attached precisely at the desired locations.
- Use a level: Making sure that each panel is perfectly horizontal will maintain the professional appearance of your fence and prevent gaps that could compromise safety.
- Follow manufacturer guidelines: It's vital to adhere closely to the spacing and attachment points recommended by the manufacturer. This ensures that the fence panels aren't only secure but also evenly distributed along your concrete surface.
Safety and Maintenance Checks
Regular inspection and maintenance of your aluminium pool fence are imperative to maintain its structural integrity and adherence to safety regulations. It is vital to examine the fence posts and panels for any signs of deterioration or damage. Compromised components could jeopardise the safety of your pool area, presenting a hazard to users.
It is crucial to check that the pool safety gate hinges and locks are in proper working order. A defective lock or hinge might allow unauthorised access to the pool area, particularly by children, heightening the risk of accidents. The spacing between the vertical and horizontal bars must comply with the NSW pool fencing requirements to deter children from squeezing through or climbing over the fence.
Assessing the non-climbable zone around the pool fence is essential to mitigate potential accidents. Any objects that could facilitate climbing the fence must be removed to ensure a secure environment.
| Checkpoint | Purpose | Emotion Evoked |
|---|---|---|
| Fence Integrity | Ensures fence's structural integrity | Security |
| Gate Functionality | Prevents unauthorised pool access | Peace of Mind |
| Compliance with Regulations | Upholds safety standards and legal compliance | Confidence |
Carrying out these maintenance checks guarantees the safety and compliance of your aluminium pool fence on concrete, creating a secure and enjoyable setting for all pool users.
Frequently Asked Questions
Can you install an aluminium fence on concrete?
Yes, you can install an aluminium fence on concrete. You'll need specialised mounting hardware to secure the posts firmly. This method provides a sturdy foundation, meeting safety regulations and improving the look of your pool area.
Does Aluminium Pool Fencing Need to Be Earthed?
No, you don't need to ground aluminium pool fencing because it's a non-conductive material. This makes it a safe, low-maintenance option for your pool area, free from the hassle of earthing.
How do you install a fence post on concrete?
To install a fence post on concrete, you'll need to drill holes for anchor bolts using a hammer drill, then secure the post with concrete adhesive or epoxy. Make sure it's level and aligned for a stable setup.
Can you install an aluminium fence yourself?
Yes, you can install an aluminium fence yourself if you've got some DIY experience and the right tools. Just ensure you're following local regulations and check the concrete's integrity before starting your project.